How to Replace an Axe Handle Part 2: Installation
Now that we have laid out how to select the right axe handle, it’s time to move on to the installation. In the second part of this series on how to replace an axe handle, I will describe how I personally install a new handle. Before we start, there are a few very important things that need to be said. First, there are many ways to hang an axe; the steps I take and the way I do things are going to be different than others. No matter what, there will be people who critique your work along the way. Do not let that discourage you, as you can’t become an expert without first being a novice. Many hours of trial and error have led to the way I currently hang an axe, and I have found these methods to be useful for the many axes that I have hung. My hope is that you will learn something from this tutorial, whether this is your first or hundredth axe to hang!
Step 1: Prep work
 The first step, which was covered in part one of this series, is to remove the old handle if applicable. In short, you need to cut the handle off just below the eye and drive the wood out in the same direction that the handle was inserted. Always make sure to wear the proper personal protective equipment. You can find out how I do this by examining Part 1: Axe Handle Selection. Some may disagree, but the next step for me is to clean the axe head and remove any flaws before the hanging process. I find it much easier to do this now because once your handle is installed, it can make some steps difficult.
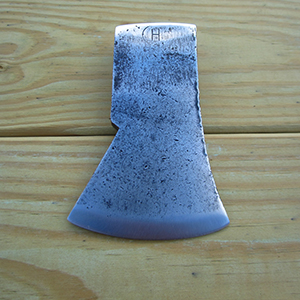
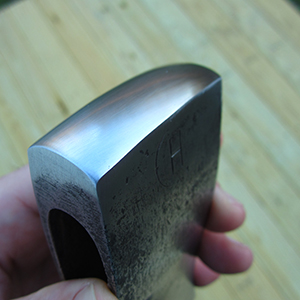
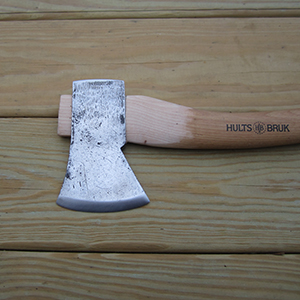
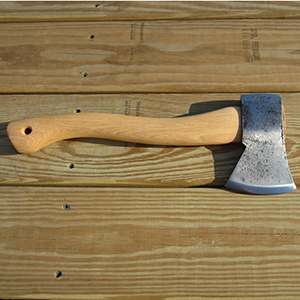
The particular head that I’m using is a vintage Hults Bruk Montreal pattern hatchet that will be used for splitting kindling and brought on camping trips. The poll of this axe had a pretty significant dent on the lower right-hand corner, and it would have taken a lot of work to make the entire poll flat. Instead, I improvised and created a curved poll, similar to what you may find on a hunter’s axe used for skinning game. I also cleaned the rest of the head and gave it a convex edge, though I will do final sharpening after the hang. It is probably best to protect yourself and the edge by placing some tape over the bit to prevent any accidents, though I did not do this during this series.
Step 2: Initial fitting
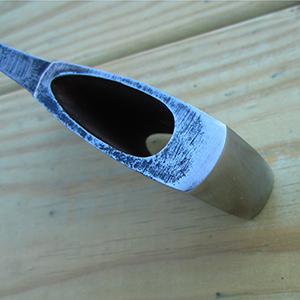
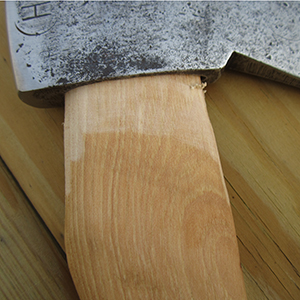
Now we need to determine how well the new handle will fit onto the axe head. Try to shove the handle into the eye of the axe. Does the head slide all the way down to the shoulder of the handle? Or, is there some resistance due to the handle being slightly larger than the eye of the axe? The second situation is more ideal, and that was what happened when handling this Hults Bruk hatchet.
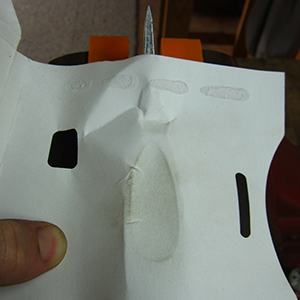
To get the handle to start going into the eye, you need to know how much material to initially remove to get it started. What I do is outline the bottom of the axe eye using some thick paper, such as cardstock. Place the paper over the eye, and then rub the paper with your thumb. The oil and dirt from your hands will show the edges, and give you the shape that you want for the handle. I then trace this outline, cut it out, and place it on top of the handle where the head will be hung. This shows me how much larger the handle is than the eye of the axe.
 I start by slowly removing some material with a draw knife or rasp, so that the handle will begin to fit. Once it will go into the eye the slightest bit, I turn the head upside down and hammer the bottom of the haft with a wooden mallet (preferred) or hammer. The head will begin to move up the handle (towards the shoulder), and at some point, it will stop going. If your helve is really tight, then it will only slide up a few millimeters.
You will now need to get the head off the haft, and this can be done two ways. First, you can hit the axe head with a mallet or dead blow hammer, striking the bottom until it comes off the handle. Or you can do what I do; I clamp the head in a vise, place a drift on the top of the helve, and then hammer the drift until the shaft pops out.
Step 3: Continued fitting
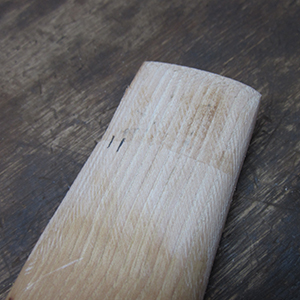
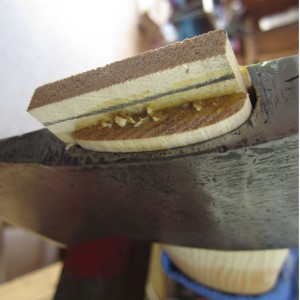
After the handle pops out, you will see some dark spots on the wood. This is normal and shows where the helve is rubbing the inside of the eye. Simply put, the dark spots need to be removed so that the head may continue to work its way down towards the shoulder. The inside of my Hults Bruk was very clean, so it was hard to see where the eye was rubbing. However, most axes have some rust inside and you will see the spots clearly.
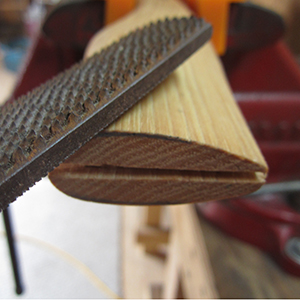
Now, you should begin removing the wood below the rubbed spots. This can be done several ways. If you’re a beginner, I suggest using a wood rasp or a four-in-hand. When more experienced, you can multiple sanding methods. My preferred method is a 5” disc that chucks into a drill that can be coupled with sticky-back sandpaper. I like 80 grit for heavy removal, but find 120 grit is the best all-around paper for wood removal. Start just below the bottom of your rub line, and sand down towards the shoulder.
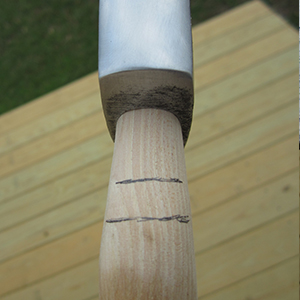
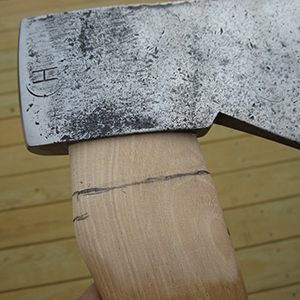
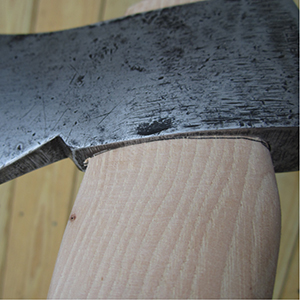
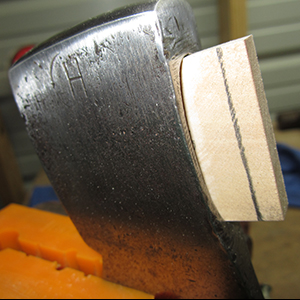
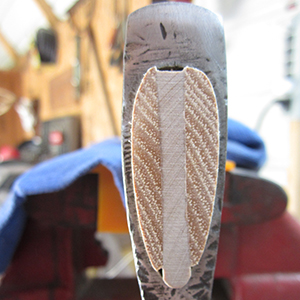
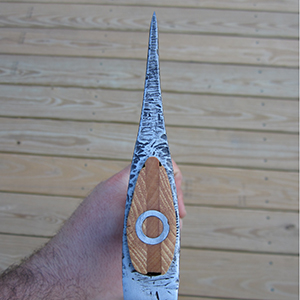
A note about “shoulders:” if the handle I’m using has a pronounced shoulder, I like to sand it off to create more of a wedge effect as the axe slides down the haft. The Hults Bruk handle was just right, so I sanded just past the bottom it to facilitate with the hanging. Meaning, if I were to stop at one place each time, I would eventually create a pronounced shoulder as I remove more material above this line. The line that I’m referring to is near the poll, where the shoulder protrudes out slightly. The bottom line that I drew (in the above picture) shows where the shoulder stops, and the top line is where I want the bottom of the eye to stop. I don’t hang my axes all the way to the bottom of the shoulder, just in case the head needs to be hung further down later.
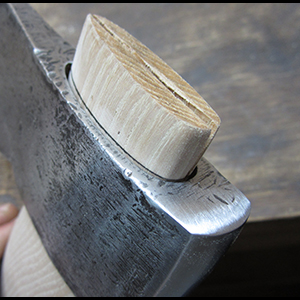
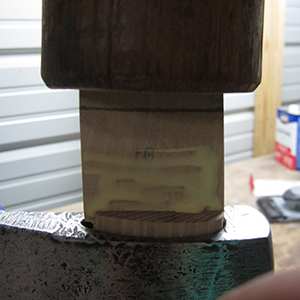
Continue to work the head down the helve until it’s just shy of your line. Once the axe is at the desired point, some of the handle should be protruding out the top. I then trace the top of the eye with a pencil before preparing the handle for the kerf cut.
Step 4: Prepare the kerf for the wedge
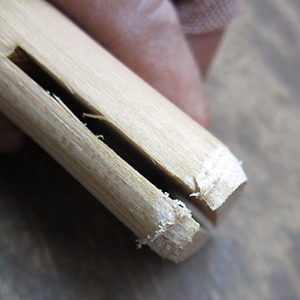
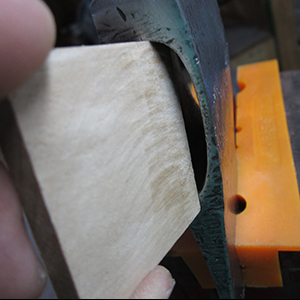
Once the head is far enough down the handle, it’s time to make sure our kerf cut and wedge are ready to go. I remove the handle, and observe the pencil line from the previous step. If I were to cut off this line, the top of the haft would be flush with the top of the axe eye. I prefer my handles to protrude slightly, or remain “proud” about ¼ of an inch. Using a ruler, I measure this length above my line and create a new cut-line. To make things simple, I then use a coping saw to cut at my new line, so that the kerf depth is accurate before final hanging.
The kerf is the cut down the centerline of the handle, where the wooden wedge is driven. Now that the helve is cut, examine the current depth of your kerf cut in relation to the line where the head stops. It’s possible the kerf isn’t deep enough at this point, so it’s time to get out the hand saw. I like for the kerf to be ⅔ of the depth of the axe head to facilitate a strong wedging. Make a mark on either side of the kerf at the proper depth, and cut to that line. I use a slightly wider saw for this step because a wider kerf is better than one that is too narrow.
Step 5: Install the wooden wedge
Proper wedge installation can make or break the entire hanging process, so extra care needs to be taken during this step. Most of the time, the wedge that comes with the handle will be adequate, as is the case with this Hults Bruk handle I received. I size up the wedge length in relation to the eye length and mark the length where the wedge would completely fill the eye. I then trim the excess material, either with a coping saw or belt sander. Next, measure the wedge depth in relation to the kerf depth, and draw a line across. This is the line that will be flush with the handle if it were to bottom out, which I don’t prefer (a bottomed out wedge means it could have possibly gone further).
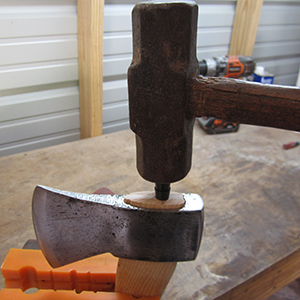
Some people may disagree, but I prefer to use wood glue on my wedges. This prevents the wedge from backing out, but it can be difficult if it ever needs replacing. There are pros and cons to the “glue vs. no-glue” debate, but I find that using glue works best for me. I pound the axe head back on the helve and clamp it in the vise. I spread an even layer of glue on either side of the wedge, and hammer it in with my mallet. I strike it just enough initially to where the wedge is somewhat tight, and won’t pop out (maybe ½” downward). Now it’s time for the final wedging, or driving the wedge home.
Hammering the wedge to its final fit can be done one of three ways, all of which include me using a wooden mallet:
1. Holding the handle off the ground, strike the top of the wedge until it won’t go any further.
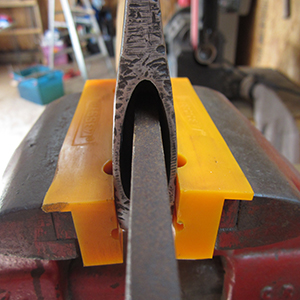
2. Placing the butt of the handle on a hard surface (such as concrete), strike the top of the wedge until it won’t go any further.
3. Placing the top of the wedge on a hard surface (such as concrete), strike the butt of the handle until the wedge won’t go any further.
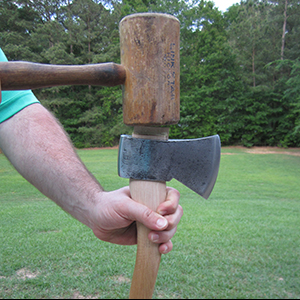
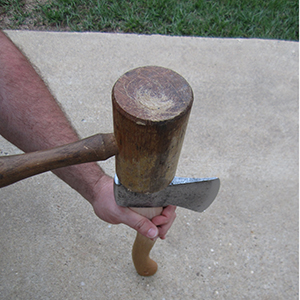
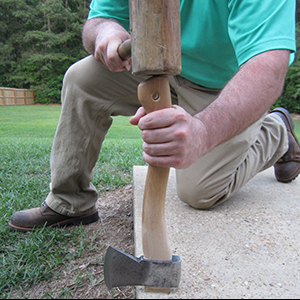
Option 2 (center picture above) has been my go-to method for a long time, though I have started to experiment with option 3 (right picture above) and have had good results. Using a wooden mallet is preferred, though I’ve used a hammer and sledge before. Go slow and watch what you’re doing. After each blow of the mallet, check your progress to make sure the wedge hasn’t bottomed out. When the wedge won’t go any further (preferably before it bottoms out), it will make a dull sound. Don’t worry if the wedge splits, as the glue will fill in the cracks. I don’t think a split wedge is a bad thing; it means that the wedge has formed to the imperfect eye and kerf, and it will not affect the performance.
Step 6: Wedge trimming and metal wedge installation
After the wooden wedge is installed, let the glue dry for at least a couple of hours. Using the coping saw, trim off the excess wedge close to the haft. Using the sanding disc chucked in the drill, sand the wood smooth and even. At this point, you should decide whether to use a metal wedge. It’s my opinion that a metal wedge is not always needed, but use one if you feel it’s necessary.
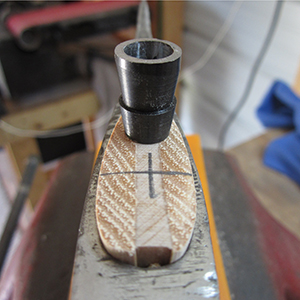
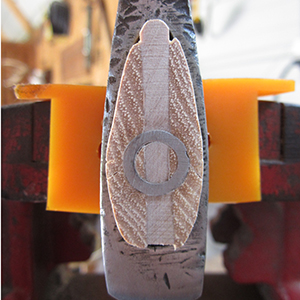
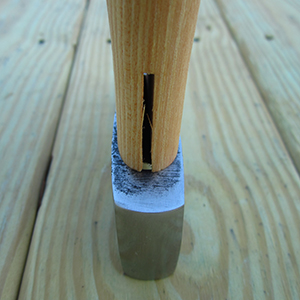
When I installed the wooden wedge, it moved on me slightly and created a gap near the poll. So, for this demonstration, I decided to use the metal barrel wedge that came with the handle. Since the top of the helve is now flush, tighten the axe handle in the vise with the top facing up. Draw an “X” where you want the wedge to be, center of the haft and as close to the poll as is needed. Using a sledge or hammer, pound the metal wedge slowly into the handle. Feel free to set the bottom of the helve on a hard surface and strike the wedge until it’s flush. Once flush, give the top a final sanding with your drill to prepare it for oiling.
Step 7: Final sanding and oiling
At this point, you’re now ready to oil the handle. I use a sheet of 120 grit sandpaper and sand the haft by hand one last time. This will remove the oils from your hands, smooth it out, and allow the oil to absorb into the wood. Your choice of oil is up to you, but I use boiled linseed oil (BLO) because it’s cheap and effective. Just make sure to properly dispose of your rags after use, because they have been known to spontaneously combust when soaked with BLO.
Applying the oil can be done several ways, but I prefer to use disposable latex gloves to keep things clean. Put some gloves on both hands, pour a little oil into one hand, and then apply it liberally over the entire handle and head. Let it dry for a few minutes, and make sure to wipe off the excess with a paper towel or lint-free rag. Repeat the above steps as many times as you would like, just realize it can get sticky if not done properly. I personally let it sit overnight, re-oil the next day, and then again for 2-3 days after that. This allows the handle to absorb a good amount of oil and prevent it from drying out. The old rule of thumb for oiling is as follows: once a day for a week, once a week for a month, once a month for a year, and once a year after that. I think this may be overkill, though it could be necessary for a dry climate. Experiment with it and don’t be afraid to try new things.
Step 8: Caring for your new handle
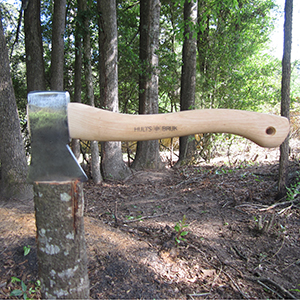
Now that your new handle is installed, it’s time to put it to the test. Try it out multiple times in different conditions to see how it performs. I generally try to push it to the limit, without abusing the axe. If all goes as planned, your handle will stay nice and tight.
The most important tip for handle care is to store it in a warm dry place. However, this location should not be too dry or hot though, because this may cause the handle to shrink. I suggest not leaning the axe against a wall either, as the handle could warp. Remember to take good care of your axe, and it will take care of you!
Disclaimer: For Educational and Informational Purposes Only. Although care has been taken in preparing this information, Hults Bruk and Jared Allement are not responsible for any errors or omissions, and neither party accepts liability for any loss or damage.
Manufacturing defects are covered under product warranty. Damage from improper usage, or normal wear and tear, are not covered under any warranty. If you have a new HB axe that you believe is defective, please contact the retailer you purchase the axe from first.
HB uses top quality American hickory handles that with care should last for many years of use. Click here for information about ordering replacement axe handles online.
