How to Sharpen an Axe
“Give me six hours to chop down a tree and I will spend the first four sharpening the axe.” -Abraham Lincoln
 If you have ever used an axe, then it’s safe to assume that you have sharpened one as well. A sharp axe is a safe axe, and let’s face it; even the best steel will become dull over time. An axe’s edge will need maintenance to remain sharp through the years, so it’s good to know some basic sharpening techniques to keep your tool in good service.
Like anything else, there are multiple ways to sharpen an axe. The way that I do it is a tried and true system for me, but everyone sharpens their tools differently. Take this information for what it’s worth, and my hope is that it will help you in some way.
First things first, you need to assess the condition of your current tool. If you have taken good care of it, you should only need a touch-up or honing to get it razor sharp. However, you may have purchased a used axe that is dull and has chips in the blade. Whatever the case, there are generally three types of sharpening options associated with axes:
Quick edge touch-up
Maintenance axe sharpening
Regrind or reprofile
For this post, I will show you the first and second options, maintenance axe sharpening and a quick edge touch-up. They are the most common that you should encounter if you properly take care of your tools. I find that regrinds are usually only necessary if you purchase used axes that have seen many years of use with little maintenance. Something to note: any time your axe requires a maintenance sharpening, it should be followed by a touch-up for desired sharpness.
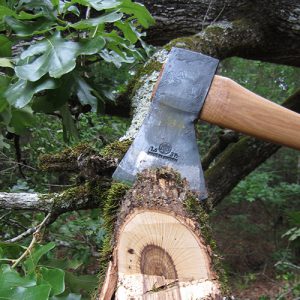
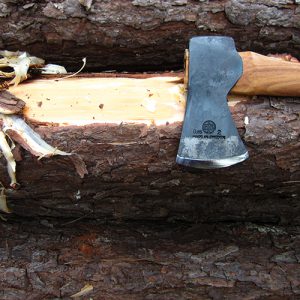
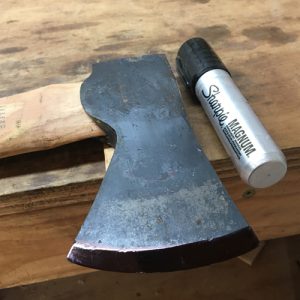
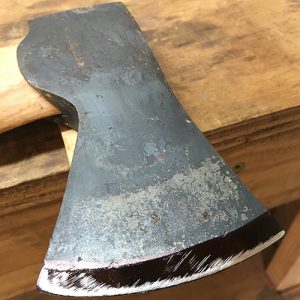
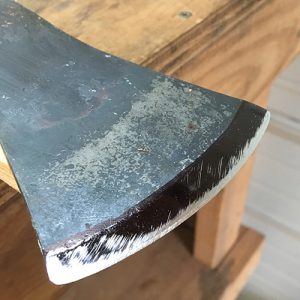
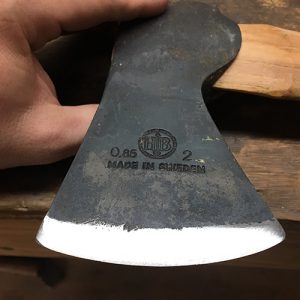
The axes in question are two Hults Bruk axes. The first is a Kisa that has hit the ground a couple of times, revealing some minor chipping of the edge. It will be perfect for the maintenance sharpening demonstration. The second is an American Felling Axe that has been used once on some seasoned oak. The cutting edge is in very good shape, and only needs an edge touch-up.
Below is a list of some different tools that I personally use to sharpen my axes. Along with these tools, you may want to use some of the optional accessories below.
Tools needed:
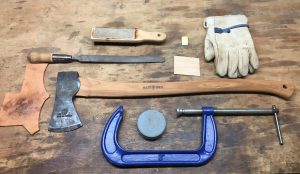 File
File
File card
Gloves
Stones
Clamp or vise
Work bench or table
Optional tools:
Wooden wedge
Permanent marker
Angle gauge/guide
Drywall hand sanding pad (sanding block)
Sandpaper sheets (various grits)
Leather strop
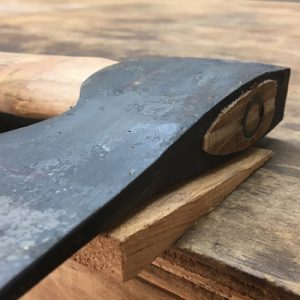
Maintenance Axe Sharpening
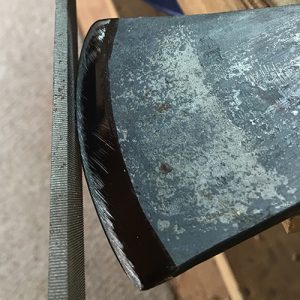
This type of sharpening can be categorized as sharpening without having to do a complete regrind. A good example would be the axe you see in the picture to the left. It probably hit the soil a couple of times, and the edge became slightly rolled and chipped. Below are a list of steps that should be taken to perform a maintenance sharpening.
 Step 1: Assess the damage to the cutting edge.
Step 2: Place a wooden wedge under head to lift the bit away from the table, as well as to add stability.
 Step 3: Clamp the axe to your table/bench. If you have a vise, you can clamp it that way as well. I find a good table works better for me. Make sure you’re wearing gloves at this point.
 Step 4: To make things easier (or if you’re a beginner to sharpening), use a black permanent marker and draw along the edge of the blade. I usually mark about 1/2” behind the cutting edge if it is already properly profiled.
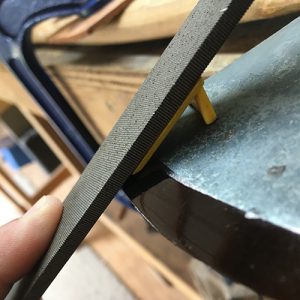 Step 5: Holding the file at an angle, push the file across the bit of the axe away from the cutting edge (towards the poll on a single bit axe). I hold the file handle in my right hand, and stabilize the top of the file in my left hand. Your left hand should be the one changing the angle of your file when necessary. A single cut file will only cut on the push stroke, so lift your file away from the bit once you reach the end of your stroke. An angle guide can be used to show you how close you are to the desired primary bevel angle. I like mine around 20-25 degrees for an axe used for chopping.
 I usually start just above the cutting edge, as you can always make your file a little steeper on your next file strokes. Clean out the file using a file card every few strokes. This will keep the file cutting properly. Make an initial assessment of the edge condition. This will show how chipped the edge really is. At this point, it may be necessary to straighten the bit if you have a chip or two that are larger than you like. To do this, skate your file across the cutting edge to “true-up” the edge and remove most of the chips. Don’t worry if some chips remain, you can work these out in the next steps.
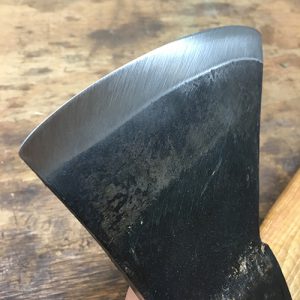
 Repeat step 5. I start closer to the cutting edge (primary bevel) this time, holding my file around 20-25 degrees. After about 2-3 strokes, I hold my file a little shallower and work more into the secondary bevel (aka sharpening bevel). This will prevent you from creating a flat grind, and instead you will be left with a convex edge that is better for chopping. Something to note: there are different types of grinds for different purposes. Since both of these axes are being used as choppers (mostly on hardwoods), I have decided that a convex grind would be the best fit.
 Once I’ve filed around 1/4” away from the cutting edge, I turn the axe over. Repeat all previous steps on the other side of the axe, using the same number of strokes as you used on the first side. Most of your chips should be out of the blade at this point. If they aren’t, hold the file a tad steeper to work them out gradually. Be careful not to go too step, as you don’t want to do a complete reprofiling of the edge if you don’t have to.
 Turn the axe back over to the original side, and hold your file a little shallower. This will allow you to file more into the cheeks. Every few strokes, make your file shallower until you get to the end of your line that you drew.
 Turn the axe over again, and file the remaining bit of the axe. Remember to use the same number of strokes on each side.
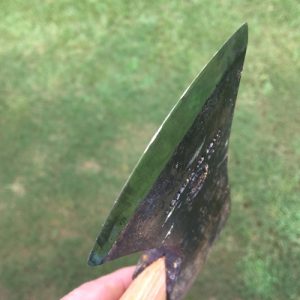
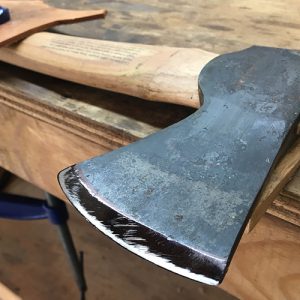
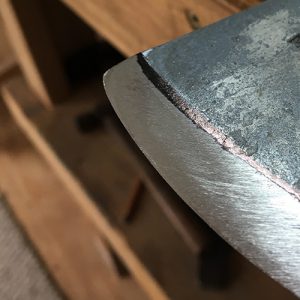
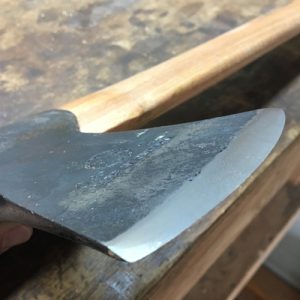
 The result should be a clean edge with a slight bur (or wire edge). Now, check your axe with an angle gauge if you have one. I personally don’t have one, and just use my eyes to tell me if I’m close.
Quick edge touch-up
 As stated before, if you take care of your axe then you should only need to touch it up between uses. However, if your edge requires sharpening with a file, then it should always be followed up with a stone. Lubricate the stone with some sort of lubricant. Depending on the type of stone, you may want to use oil or water. For the puck stones, I generally use water.
 Holding a stone in your hand, run it over the edge in a circular motion to remove the bur. Work the stone away from the edge, the same direction in which you filed. Remember, don’t use too steep of an angle. Start with a coarse stone and work your way up to finer stones to create a sharp edge. Use the course stone on side 1 of the axe, then turn it over to side 2. Always use the same number of strokes. Do the same thing with the fine stone on both sides of the axe. I find a circular axe stone works best. It has both a coarse and fine side, and fits in the hand nicely.
 Really you can stop here, but sometimes I’ll run the axe over a piece of leather to remove any remaining bur left on the edge. Place the leather on a table and hold it with one hand. Holding the axe in your other hand, pull the axe away from you. Make sure you hit all the different points of the edge. Do this for a few strokes, then turn it over and do the same thing on the other side. A leather strop works better for this task, but a scrap piece of leather is really all you need.
 Test the edge. A truly sharp edge is one that will dry shave the hair off your arm.
Other options
When you need to reprofile an axe, or even to perform heavy maintenance sharpening, a file is really all you need. However, there are other ways to do this more quickly.
Belt sanders or belt grinders are great tools if you know how to properly use them. Be sure to keep the edge cool by dipping it in water, and go slow. You don’t want to overheat the bit and ruin the temper. If you don’t know what you’re doing with these tools, it’s best to stick to files.
Never use high speed grinders (such as bench grinders with stone wheels). The only time stone wheels should be used is when it is slow moving, such as a pedal wheel grinder. Instead of using stones, you can also use various grits of sandpaper to create a polished edge. I learned this one from Craig Roost over at the Axe Junkies Facebook group.
Using a drywall sanding pad, start with a coarse sandpaper, and attach a sheet using the clips on the pad. Place the pad on the bit on the axe, and push the pad towards the edge in a diagonal motion. This is the same motion that you use when filing an axe, except you are going towards the edge instead of filing away from the edge.
 Keep pressure near the rear of the pad so that you don’t go too shallow. Get a view from the side to see exactly where the sandpaper is hitting. You don’t want to make the bur worse, instead go a little shallower to remove the bur completely.
Work your way up using various grits of sandpaper. I usually use the following grit sequence: 100, 220, 320, 400, 600, 1000, 2000, and then a leather strop with polishing compound. You could add 800 and 1500 to that mix if you preferred.
 The final product will be a mirror finish on a razor-sharp edge if done properly. Test your edge using the dry shave test, or you can go one step further with the paper test. If your axe will slice through a sheet or paper, then it is sharp!
Through the years, I have seen many axes that were used and abused. It takes a great deal of time to properly bring these axes back to life. Even though an axe is a tool that is meant to be used, it should also be treated with respect and properly maintained. An ounce of prevention is worth a pound of cure; take care of your axe, and it will take care of you!
Also see our instructionals on how to select a new Hults Bruk axe handle, and how to hang an axe handle.
Disclaimer: For Educational and Informational Purposes Only. Although care has been taken in preparing this information, Hults Bruk and Jared Allement are not responsible for any errors or omissions, and neither party accepts liability for any loss or damage.
Manufacturing defects are covered under product warranty. Damage from improper usage, or normal wear and tear, are not covered under any warranty. If you have a new HB axe that you believe is defective, please contact the retailer you purchase the axe from first.